
Get your science in Shape
The Bump Modifier is designed to add individual bumpy extrusions to a mesh. Position, orientation and detailed shape of the bump can be controlled.
To add a Bump Modifier to the Modifier Stack, click on the Add Modifier button (the + sign under the Modifier Stack) and select Bump.
The modifier appears at the end of the stack. It is important to note that the detailed effect of the modifier may depend on the position within the stack. Therefore experiment how it interacts with other modifiers before or after in the list.
Different properties of the Bump Modifier is controlled in different places.

The Control Panel under the Modifier Stack has several check marks:
Enable: Enable or disable the Bump Modifier
Symmetric: By default the bump will be cylindrically symmetric around its direction axis that can be seen when the Widget is on. Then the check mark is on. When the Symmetric flag is off, then the bump will be infinite in one direction and controllable in the other.
Radial: When the Radial flag is checked, then the bump will be applied radially from the coordinate center of the Widget. Otherwise it is parallel to the directional axis (pink) of the the Widget starting in the plane that contains its coordinate center.

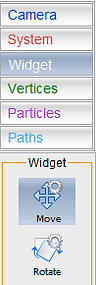
Widget: Posititon & Orientation
The position and orientation are controlled with the Widget. The numerical control panel for the Widget can be opened by clicking on the Widget button in the Control Panel. Alternatively, use the interactive Widget controls on the left side of the 3-D views. As usual, during interactive control use the x, y and z keys to restrict moving and rotating actions to a particular axis.
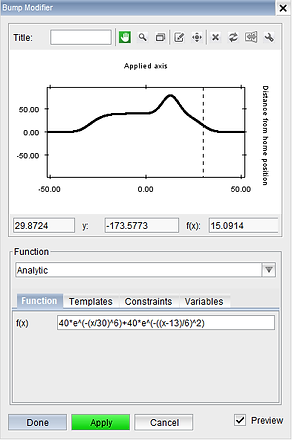
Magnitude: Shape & Size
The shape and size of the bump are controlled from the Magnitude Graph that is accessed in the Control Panel under the Modifier Stack.
The Magnitude Graph works the same way as other graphs in Shape. For details see the user manual entry for Graphs.
The shape of the bump is set using an Analytic function or a Point graph, where the "x" is the distance from the local coordinate system (widget axis) is cylindrical coordinates. For the "symmetric", i.e. cylindrically symmetric case, the values at negative x are ignored.
By default the shape of the bump is set to a Gaussian function.
The overall size of the bump can additionally be controlled using the f0 parameter in the top left corner.
Magnitude: Change the bump structure
The detailed shape of the bump can be arbitrarily complex. This can be achieved by changing the Analytic function as shown in the examples on the right. Alternatively, for even more arbitrary complexity use the Point function by clicking on the Function drop-down list. Edit the Point function following the instructions in on the Graphs page.
Mesh resolution:
Note that the application of the Bump Modifier may lead to poor mesh resolution in the bump. Currently the mesh resolution can not be improved locally. Therefore, if necessary, the overall mesh resolution can be increased by increasing the number of Segments in the Primitive tab of the object.


Modifiers: Bump
